The Mac admin community benefits from a wealth of open-source tools for solving our shared challenges. I’d like to highlight one such tool that I’ve come to depend on: MunkiPkg. Created by the prolific Greg Neagle, MunkiPkg streamlines the process of building Mac installer packages from source files.
IT and security professionals have needed to install software and other items on their Mac fleets for decades now, so of course there’s no shortage of packaging tools available. Projects like The Luggage, pkggen, PackageMaker, Packages, Composer, and QuickPkg all serve this need with varying degrees of simplicity and automation. Even with all those choices available, I often find myself reaching for MunkiPkg when creating a new custom package for a few compelling reasons:
-
Collaboration-friendly. The ability to check MunkiPkg projects into a Git repository and share maintenance duties with colleagues gives MunkiPkg an edge over tools like Composer that are built to store sources on a single device.
-
Human-readable config. The package metadata for MunkiPkg projects is in plist format by default, but can be in JSON or YAML if desired. I prefer YAML due to its brevity and readability.
-
Automatable. If your Git host supports CI/CD workflows, it’s a straightforward process to configure your runner to build packages from source when the main branch is updated.
-
Simple, but capable of handling complexity. A generic MunkiPkg project contains only a few simple ingredients (payload, scripts, and metadata). If you require more advanced permissions and configurations, a Bom.txt file and additional metadata keys are available.
-
Sane defaults. MunkiPkg’s default settings encourage consistent package receipt identifiers and semantic versioning, and projects are structured in a way that is both understandable and non-proprietary.
A note about the name
Don’t be fooled: MunkiPkg does not require or depend upon Munki. MunkiPkg can be used to create installer packages that work with any software deployment tool that deploys .pkg files, including Munki, Jamf Pro, and many others.
Walkthrough
To demonstrate MunkiPkg’s simplicity, I’d like to lead you through creation of an installer that places your company logo at a predetermined location on disk.
Installing MunkiPkg
MunkiPkg is a Python script, so my preferred way of “installing” it is to clone the GitHub repository and place a symbolic link (symlink) in the shell PATH.
Cloning the Git repo instead of just downloading the script itself ensures that you can use git pull to get the latest changes when MunkiPkg is updated in the future.
note
The steps below use ~/Developer to store your sources, but you should adjust that path to wherever you store your source code.
-
Clone the MunkiPkg project from GitHub.
git clone https://github.com/munki/munki-pkg.git ~/Developer/munki-pkg -
Create a folder at /usr/local/bin if it doesn’t already exist:
mkdir -p /usr/local/bin -
Create a symlink in /usr/local/bin that points back to the munkipkg script itself.
ln -s "$HOME/Developer/munki-pkg/munkipkg" /usr/local/bin/munkipkg -
Test it out.
munkipkg --versionIf successful, you should see the current MunkiPkg version number in the output.
Creating a project
Now that MunkiPkg is installed, you use the --create flag to create a new project:
munkipkg --create ~/Developer/pretendco_logo
Or if you prefer a format other than plist for your build-info files, you can specify JSON:
munkipkg --create --json ~/Developer/pretendco_logo
Or YAML (my personal preference):
munkipkg --create --yaml ~/Developer/pretendco_logo
(Install PyYAML using pip install -U PyYAML first, if needed.)
This will create a folder at the specified path with the necessary scaffolding. You’ll see the following:
-
build-info.plist (or .yaml or .json)
The metadata for the package, including identifier and version.
-
payload
The folder that contains the paths that will be installed on the target volume. Empty by default.
-
scripts
The folder that contains preinstall or postinstall scripts. Empty by default.
Customizing your project
Once you’ve created the project, you’ll want to customize the following:
-
Open the build-info plist, yaml, or json file and adjust as desired:
- The
namewill be the filename of the resulting package. - The
identifierwill be used when creating a package receipt. It’s conventional to use reverse domain naming based on a domain you or your organization owns, likecom.pretendco.logo. - The
versionis1.0by default. You’ll increment this upward as you modify and rebuild the package.
- The
-
Copy the logo into the desired path within the payload folder. Any folder structure you create within payload will be recreated on the target disk when you run the resulting installer.
cd ~/Developer/pretendco_logo mkdir -p payload/Library/PretendCo/ cp ~/Downloads/logo.png payload/Library/PretendCo/logo.png -
Since this example project doesn’t require any preinstall or postinstall scripts, you can remove the scripts folder or just ignore it.
rm -r scripts/At this point your project will look like this:
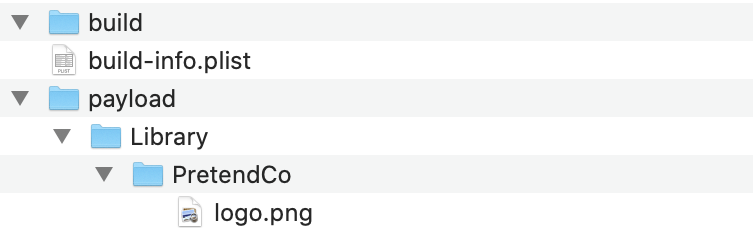
Building the package
Once the project metadata and contents are ready, you can build the package by running munkipkg followed by the path to the project.
munkipkg ~/Developer/pretendco_logo
Note that you can just use . if your current working directory is the project folder itself.
cd ~/Developer/pretendco_logo
munkipkg .
MunkiPkg supports idempotency, so building the project repeatedly from the same source should produce exactly the same result.
Once built, the finished package will appear in the build folder inside your project. From here, you can copy the package to your software distribution tool and send it to your company’s Macs as you normally would.
Modifying the package
Let’s say your company decides to change their logo. No need to start over! Instead, just tweak the project like so:
- Replace the logo.png file in the payload folder.
- Increment the version in the build-info file (for example, from
1.0to1.1). - Build the project and import the resulting package into your software distribution tool.
MunkiPkg really shines here by encouraging you to treat package sources the same way you would treat a software code base: improve, increment, build, release.
When to use other tools
It’s rare that a single tool will satisfy all possible scenarios, and MunkiPkg is no exception. Here are a few specific use cases that may favor other packaging tools:
-
Publicly-downloadable software. In my opinion, AutoPkg is by far the best way to package and process Mac software that can be downloaded from a public URL.
-
Applications or other software bundles. If you need to manually wrap an app or other bundle into a software installer and can’t use AutoPkg, you may want to check out QuickPkg.
-
Installers that require interface customization. The installers that MunkiPkg produces are ideal for silent background installation, but if you require a custom installer interface or installation choices, a more full-featured tool like Packages may be what you need.
Further Reading
I’ll be returning to the topic of MunkiPkg in the future. Until then, here are a few articles and resources about MunkiPkg:
- Greg Neagle: Introducing MunkiPkg
- REDline: Using MunkiPkg
- Mat X: Use Munki to install a screensaver
- Josh Hovinetz: Signing Package Bundle Installers With munkipkg
- Alan Siu: Don’t store your munkipkg files in Google Drive File Stream
Armin Briegel’s book Packaging for Apple Administrators is an excellent resource and dedicates a few pages to MunkiPkg.
For near-realtime help, the people in the #packaging channel in MacAdmins Slack can answer questions about MunkiPkg and packaging in general.

